


Thin Chocolate Wafer Garnishes – Easy and Elegant Dessert Decoration
Share
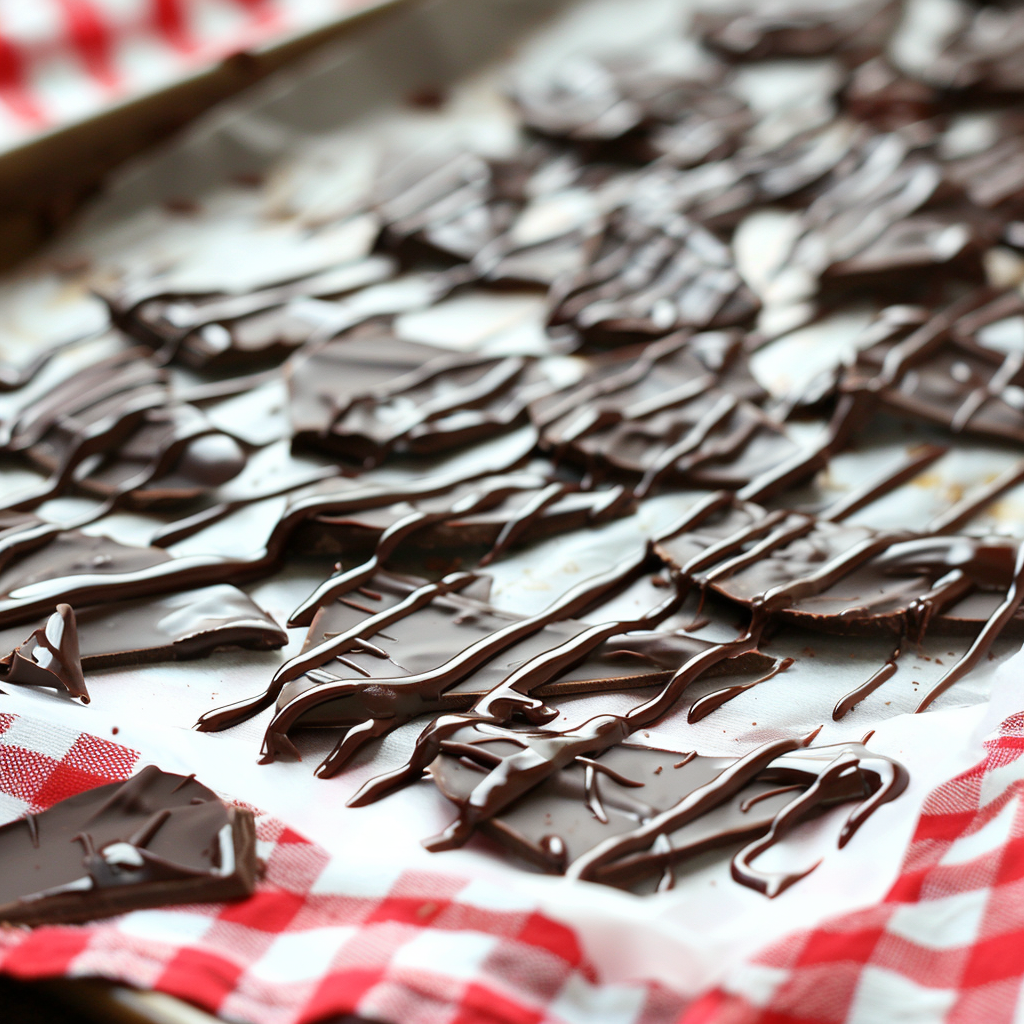
As a home baker, there's always room to enhance your decorating skills, and one of the simplest yet most effective ways to do this is by mastering little tricks like creating your own chocolate wafer garnishes. Whether you’re making a special cake or just elevating a weeknight dessert, these thin chocolate wafers add a professional touch. I love how they bring elegance without requiring too much effort or expensive ingredients. By choosing quality chocolate and spreading it thinly, you can transform any dessert into something extraordinary. The best part? These delicate wafers aren’t just for looks—they offer a delicious bite that perfectly complements the textures and flavors of your creations.
Reading ingredient labels and recognizing processed ingredients is key. Choosing high-quality dark chocolate ensures you’re working with fewer additives and enjoying all the natural benefits chocolate can offer. Let’s dive into this simple recipe to elevate your dessert game.
Did You Know?
Chocolate wafers became popular because they offer both a stunning visual element and a sophisticated touch of flavor. High-quality dark chocolate contains antioxidants that may promote heart health. The higher the cocoa content, the more concentrated the health benefits, making your dessert garnishes not only beautiful but beneficial too.
Yield:
About 24 thin wafers
Ingredients:
1 cup high-quality dark chocolate (70% cocoa or higher)
Instructions:
Melt the Chocolate:
Chop the dark chocolate into small, even pieces to ensure it melts evenly. Place the chopped chocolate in a heatproof bowl.
Personal Tip: Use a sharp knife to chop the chocolate finely for quicker and more even melting.
Temper the Chocolate (Optional for a shiny finish):
Double Boiler Method: Set the bowl over a pot of simmering water, ensuring the bottom of the bowl does not touch the water. Stir constantly until the chocolate melts and reaches 115°F (46°C). Remove from heat and let it cool to about 82°F (28°C). Reheat slightly to 88-90°F (31-32°C).
Microwave Method: Microwave the chocolate in short bursts (20-30 seconds), stirring in between, until fully melted. Avoid overheating.
Personal Tip: If you're in a hurry, the microwave method is great, but be sure to stir often to prevent scorching.
Prepare a Flat Surface:
Line a baking sheet or flat surface with parchment paper or a silicone baking mat.
Personal Tip: Silicone mats are reusable and ensure that the chocolate won’t stick, making cleanup easier.
Spread the Chocolate:
Pour the melted chocolate onto the prepared surface and use an offset spatula to spread it into a thin, even layer. The thinner you spread it, the more delicate your wafers will be.
Personal Tip: For an ultra-thin finish, hold the spatula at a slight angle and spread gently.
Create the Wafer Shapes:
Allow the chocolate to partially set at room temperature. Once it’s semi-set but still pliable, use a sharp knife, cookie cutter, or pastry wheel to cut out shapes. You can make simple squares, rectangles, or use decorative cutters for unique designs.
Personal Tip: If you're using cookie cutters, lightly oil them to ensure easy release.
Let the Chocolate Set Completely:
Let the chocolate wafers set completely at room temperature or in the refrigerator for a quicker set.
Personal Tip: Setting the chocolate in the fridge helps solidify the wafers faster but avoid freezing to maintain texture.
Store and Use:
Carefully peel the chocolate wafers off the parchment paper or silicone mat and store them in an airtight container in a cool, dry place until you’re ready to use them.
Personal Tip: If stacking wafers in storage, place parchment paper between layers to prevent sticking.
Nutritional Information (Per Serving):
Calories, 60, Protein, 1g, Carbohydrates, 6g, Fiber, 1g, Net Carbohydrates, 5g, Fat, 4g, Saturated Fat, 2.5g, Cholesterol, 0mg, Sodium, 0mg, Sugars, 4g, Glycemic Index, Low
Kitchen Tips, Great Ideas, How to Save Money
-
Choose High-Quality Chocolate: Opt for dark chocolate with at least 70% cocoa for a richer flavor and smoother melting. Purchasing chocolate in bulk can save money, especially when making large batches.
-
Mastering Chocolate Tempering: If you want a glossy, professional finish, tempering the chocolate is key. While optional, it’s worth mastering for that shiny, snappy texture. Don’t rush the process, as it’s essential to control the temperature carefully.
-
Efficient Workspace Setup: Always have your parchment paper or silicone mat ready before starting to melt the chocolate. This minimizes downtime and ensures you can pour and spread the chocolate quickly while it’s still workable.
-
Thin and Delicate Wafers: The thinner you spread the chocolate, the more elegant the wafers will be. Thin wafers are perfect for delicate dessert garnishing because they don’t overpower the dish but add a lovely texture.
-
Creative Cutting Techniques: If you’re feeling creative, use various cookie cutter shapes for different occasions. Whether you opt for hearts, stars, or simple squares, personalized wafers can add a unique touch to your presentation.
-
Storage and Shelf Life: Chocolate wafers store well in airtight containers for up to a month if kept in a cool, dry place. You can make these ahead of time and have them ready to garnish desserts or beverages anytime.
-
Cost-Effective Garnishing: Homemade chocolate wafers are much more affordable than store-bought decorative garnishes. Plus, they give you control over the quality and shape.
-
Versatile Garnishing Options: These wafers can be used not only on cakes and desserts but also in hot beverages like coffee or hot chocolate. It’s an easy way to elevate simple drinks into something special.
-
Avoiding Over-Melting: If you’re melting chocolate in the microwave, always heat in short bursts and stir in between. This avoids the risk of overheating and ensures a smooth, glossy result.
-
Enjoyment Beyond Garnishing: These wafers aren’t just for decoration! Enjoy them on their own as a treat, paired with coffee or tea, for a luxurious, yet simple snack.
Let’s Learn About the Various Percentages of Chocolate and The Benefits
When it comes to chocolate, understanding cocoa percentages is important for both taste and health. Dark chocolate typically has a cocoa content ranging from 50% to 100%. The higher the percentage, the more cocoa solids it contains, which means more antioxidants and less sugar. For example, 70% dark chocolate strikes a balance between flavor and bitterness, offering health benefits like improved heart health, thanks to flavonoids that help lower blood pressure. Meanwhile, 85% dark chocolate contains even less sugar and provides a more intense chocolate flavor, ideal for true chocolate lovers. Be sure to check the ingredient label when buying chocolate. The fewer ingredients (like emulsifiers and added sugars), the better it is for both your recipe and your body. Opt for chocolate that lists cocoa as the first ingredient to ensure you’re getting a high-quality product with all the natural benefits of cacao.