


Perfectly Fluffy Deep-Fried Donuts with Easy Glaze Recipe
Share
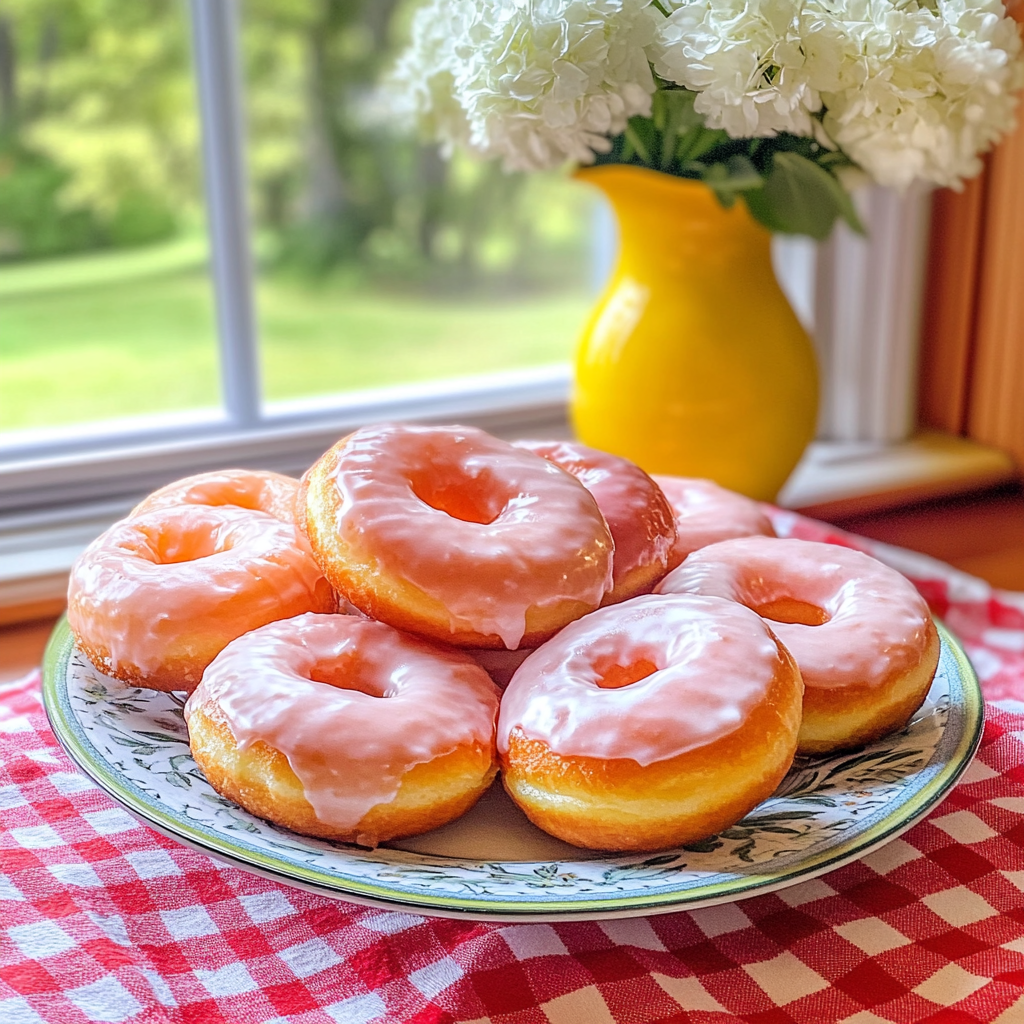
Fluffy Deep-Fried Donuts: A Very Special Treat
Making homemade donuts with my family is always a blast. I don’t deep fry very often, but when I get a craving for homemade donuts, it turns into a full-on event at our house. The whole process is a joy—from watching the dough rise, to cutting out those perfect donut shapes, and hearing that satisfying sizzle as they hit the hot oil. The kitchen fills with the most amazing aroma, and soon everyone’s gathered around, eager to pick their toppings. Whether it’s a simple glaze, a dusting of cinnamon sugar, or something more creative, we all have our favorites. But honestly, the best part isn’t just eating the donuts—it’s the fun we have making them together, the indulgence and sharing the experience makes every bite even sweeter.
Did You Know?
Donuts, also known as doughnuts, have a rich history dating back to the 19th century. They were originally brought to America by Dutch settlers who made "olykoeks" or oily cakes. The modern donut, with its iconic hole, is often credited to Captain Hanson Gregory, who supposedly invented it in 1847 to avoid undercooked centers. Donuts are beloved worldwide, with countless variations and flavors. The combination of a fluffy interior and a crispy exterior makes deep-fried donuts a timeless treat.
Yield: 12 regular-sized donuts
Ingredients:
For the Donuts:
- 2 1/4 teaspoons active dry yeast
- 1/2 cup warm water (110°F)
- 1/4 cup granulated sugar
- 1/4 cup unsalted butter, melted
- 1/2 cup warm milk (110°F)
- 1 teaspoon salt
- 2 large eggs
- 4 cups all-purpose flour
- Vegetable oil for frying
For the Glaze:
- 2 cups powdered sugar
- 1/4 cup milk
- 1 teaspoon vanilla extract
Instructions:
Prepare the Dough:
In a small bowl, dissolve the yeast in warm water and let it sit for about 5 minutes until frothy.
Personal Tip: Proofing the yeast ensures it’s alive and active, which is crucial for fluffy donuts.
In a large mixing bowl, combine the sugar, melted butter, warm milk, salt, and eggs. Add the frothy yeast mixture and stir to combine.
Personal Tip: Adding the yeast mixture to the wet ingredients helps incorporate it evenly throughout the dough.
Gradually add the flour, 1 cup at a time, mixing until a soft dough forms.
Personal Tip: Adding flour gradually prevents the dough from becoming too dense and helps achieve the perfect texture.
Knead the dough on a lightly floured surface for about 5-7 minutes until it is smooth and elastic.
Personal Tip: Kneading develops the gluten in the dough, giving the donuts their signature chewiness.
Place the dough in a greased bowl, cover with a damp cloth, and let it rise in a warm place for about 1-1.5 hours, or until doubled in size.
Personal Tip: A warm, draft-free environment helps the dough rise evenly and quickly.
Shape the Donuts:
Punch down the risen dough and roll it out to about 1/2 inch thickness on a floured surface.
Personal Tip: Rolling the dough to an even thickness ensures all the donuts fry uniformly.
Use a donut cutter or two round cutters (one large and one small) to cut out donut shapes. Gather and re-roll the dough scraps as needed.
Personal Tip: If you don’t have a donut cutter, a large cup and a bottle cap work well in a pinch.
Place the cut donuts on a parchment-lined baking sheet, cover with a cloth, and let them rise for another 30 minutes.
Personal Tip: Allowing the donuts to rise again gives them that extra fluffiness when fried.
Fry the Donuts:
Heat the vegetable oil in a deep fryer or large heavy-bottomed pot to 350°F (175°C).
Personal Tip: Use a deep-fry thermometer to maintain the oil temperature, ensuring perfectly fried donuts.
Carefully add the donuts to the hot oil, a few at a time, and fry for about 1-2 minutes on each side, or until golden brown.
Personal Tip: Frying in batches prevents the oil temperature from dropping too much, which can result in greasy donuts.
Use a slotted spoon to remove the donuts from the oil and drain them on paper towels.
Personal Tip: Draining on paper towels removes excess oil, keeping the donuts light and crispy.
Prepare the Glaze:
In a medium bowl, whisk together the powdered sugar, milk, and vanilla extract until smooth.
Personal Tip: For a thicker glaze, reduce the amount of milk slightly.
Glaze the Donuts:
While the donuts are still warm, dip them into the glaze, turning to coat both sides.
Personal Tip: Glazing while warm allows the glaze to set nicely on the donuts without soaking in too much.
Place the glazed donuts on a wire rack to allow the glaze to set.
Personal Tip: A wire rack prevents the glaze from pooling and ensures an even coating.
Nutritional Information (Per Serving): Calories: 300, Fat: 15g, Saturated Fat: 5g, Carbohydrates: 40g, Fiber: 1g, Sugars: 25g, Protein: 5g
Kitchen Tips, Great Ideas, How to Save Money
- Proofing Yeast: Make sure your yeast is fresh and active. Proofing the yeast in warm water with a bit of sugar helps ensure it’s alive. If it doesn’t froth, start with new yeast to avoid wasting ingredients.
- Oil Temperature: Maintaining the correct oil temperature is crucial for perfect donuts. Use a deep-fry thermometer to ensure the oil stays at 350°F (175°C). If the oil is too hot, the donuts will burn on the outside and remain raw inside. If too cool, they’ll absorb excess oil and become greasy.
- Homemade Cutter: If you don’t have a donut cutter, use a round cookie cutter and a smaller one (like a bottle cap) for the center hole. This way, you can still achieve the classic donut shape without special equipment.
- Flour Alternatives: For a slightly different texture and flavor, try substituting a portion of the all-purpose flour with cake flour. This can make the donuts even fluffier and lighter.
- Flavor Variations: Enhance the flavor of your donuts by adding a pinch of nutmeg or cinnamon to the dough. You can also try different glazes like chocolate, maple, or a simple cinnamon sugar coating.
- Leftover Dough: Any leftover dough scraps can be rolled into small balls to make donut holes. These are perfect for quick snacking and often cook faster than the full-sized donuts.
- Homemade Glaze: Making your own glaze is more cost-effective and allows you to control the sweetness. You can experiment with different flavors by adding extracts or citrus zest to the glaze.
- Storage: Store leftover donuts in an airtight container at room temperature. They’re best eaten fresh but can be revived with a few seconds in the microwave if they start to stale.
- Eco-Friendly Practices: Use reusable silicone baking mats instead of parchment paper for an eco-friendly option. Store leftovers in glass containers rather than plastic to keep food fresh longer.
- Serving Ideas: Serve these donuts with fresh fruit, a dollop of whipped cream, or a drizzle of chocolate sauce for an extra indulgent treat. Pair them with coffee or tea for a delightful breakfast or dessert.
Deep Frying in Moderation
Deep-frying is a cooking method that produces incredibly flavorful and crispy results, but it’s important to enjoy it in moderation. While deep-fried foods can be high in calories and fat, choosing the right oil and maintaining the proper temperature can make a big difference. Oils like canola, peanut, and sunflower oil are great for deep frying due to their high smoke points, meaning they can withstand the heat without breaking down and imparting off-flavors. It’s also key to monitor the temperature closely—if the oil is too hot, your food may burn on the outside before cooking through, and if it’s too cool, the food will absorb too much oil, becoming greasy. Deep-frying at home allows you to control these variables and enjoy the occasional treat with a bit more health consciousness. Whether it’s donuts, fries, or tempura, deep frying can be part of a balanced diet when enjoyed as an occasional indulgence.