


Nutella Cupcakes with Creamy Nutella Filling and Buttercream Frosting
Share
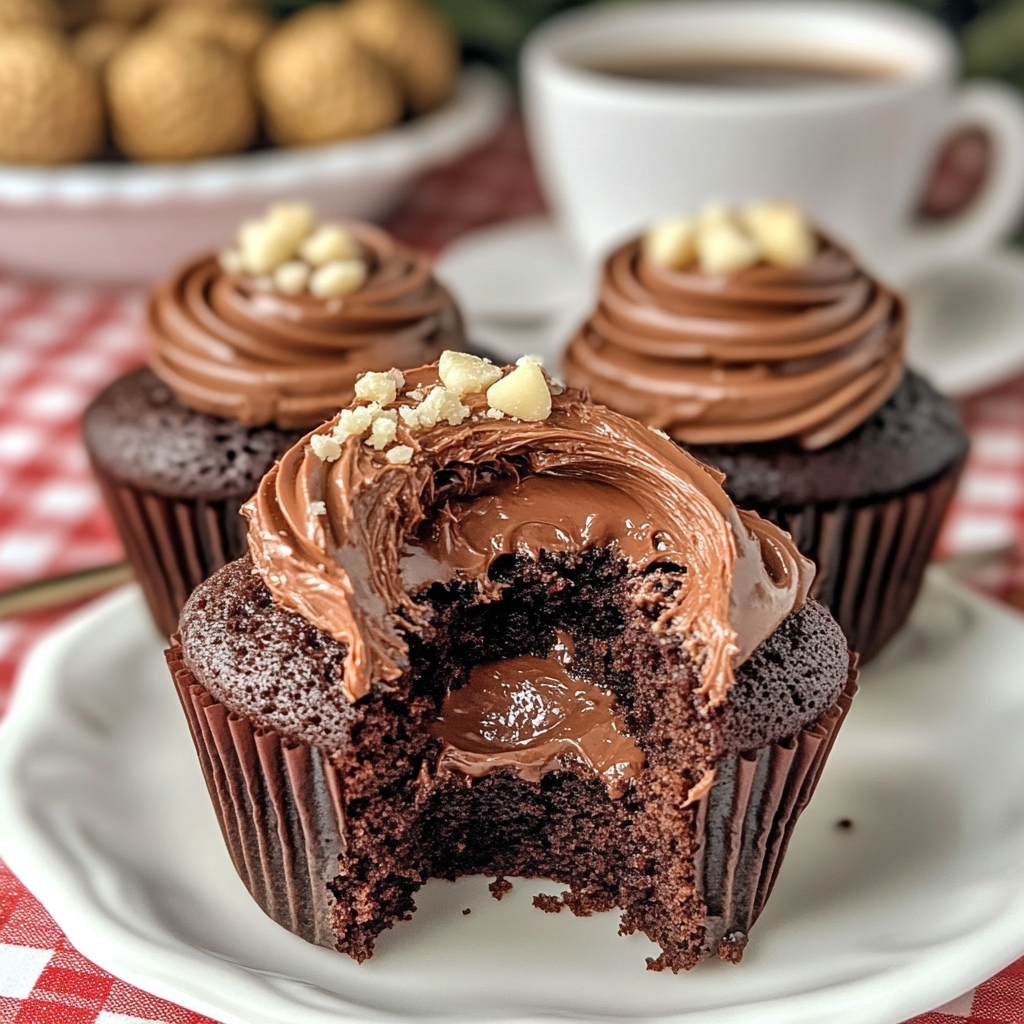
Nutella Cupcakes: It's All About the Nutella
Nutella, the beloved chocolate-hazelnut spread, has captured the hearts of people around the world. Originally created in Italy by Pietro Ferrero during World War II, Nutella was developed as a solution to a cocoa shortage. Ferrero mixed hazelnuts with a little bit of cocoa, creating a delicious spreadable paste known as "Pasta Gianduja." Eventually, this evolved into the Nutella we know and love today. Over time, it became a global sensation, thanks to its rich, creamy texture and versatility in both sweet and savory dishes. Whether spread on toast or used in decadent desserts like these Nutella Cupcakes, it’s no wonder Nutella has become a pantry staple for many.
Did You Know?
Ferrero Rocher chocolates, also created by the same company that produces Nutella, have gained massive popularity for their luxurious taste and presentation. Wrapped in gold foil and containing a hazelnut inside, these chocolates symbolize indulgence. The combination of smooth chocolate, hazelnut, and crispy layers makes Ferrero Rocher a favorite during holidays and celebrations worldwide.
Yield: 12 cupcakes
Ingredients:
Chocolate Cupcakes:
1 1/4 cups all-purpose flour
1 cup sugar
1/2 cup unsweetened cocoa powder
1 tsp baking powder
1/2 tsp baking soda
1/2 tsp salt
1/2 cup vegetable oil
2 large eggs
1 tsp vanilla extract
1/2 cup sour cream
1/2 cup hot water
Nutella Filling:
1 cup Nutella
Nutella Buttercream:
1/2 cup unsalted butter, room temperature
1/2 cup Nutella
1 tsp vanilla extract
2 cups powdered sugar
2-3 tbsp heavy cream
Instructions:
Preheat Oven:
Preheat to 350°F (176°C) and prepare a cupcake pan with liners.
Make Cupcakes:
In a large bowl, sift together the flour, sugar, cocoa powder, baking powder, baking soda, and salt.
In another bowl, combine the oil, eggs, and vanilla. Mix in sour cream.
Personal Tip: Add the hot water gradually to avoid lumps in the batter and to keep the mixture smooth.
Combine the wet and dry ingredients, then gradually add the hot water.
Fill liners and bake for 18-20 minutes. Cool completely.
Fill Cupcakes:
Once cooled, use a small knife to cut a hole in the center of each cupcake. Fill with about a teaspoon of Nutella.
Personal Tip: When filling the cupcakes, use a piping bag for more control over the filling amount.
Nutella Buttercream:
In a large bowl, beat the butter and Nutella until smooth. Add the vanilla extract and powdered sugar. Gradually add the heavy cream until the frosting reaches a spreadable consistency.
Personal Tip: If your frosting is too thick, add a little more cream; if too thin, add more powdered sugar.
Frost and Garnish:
Pipe the Nutella buttercream onto the cupcakes. Garnish with a piece of chopped hazelnuts if desired.
Personal Tip: Use a star tip for a professional look when piping the buttercream onto the cupcakes.
Nutritional Information (Per Serving):
Calories: 450, Protein: 5g, Carbohydrates: 50g, Sugars: 35g, Total Fat: 25g, Saturated Fat: 12g, Sodium: 180mg, Fiber: 2g
Kitchen Tips, Great Ideas, How to Save Money
1. Ingredient Substitutions: Use store-brand ingredients for a more budget-friendly option. Generic brands often offer similar quality at a lower cost.
2. Homemade Nutella: Consider making your own Nutella at home with hazelnuts, cocoa powder, and a sweetener to control the ingredients and cost. Homemade spreads can be more economical and allow you to customize the flavor.
3. Cupcake Storage: Store cupcakes in an airtight container at room temperature for up to 2 days, or refrigerate for up to a week. Bring to room temperature before serving to enjoy the best texture and flavor.
4. Leftover Nutella: Use leftover Nutella as a dip for fruit, spread on toast, or swirl into pancake batter for a delicious breakfast treat. Nutella can also be mixed into Greek yogurt for a quick and satisfying snack.
5. Batch Baking: Double the recipe and freeze half the cupcakes (without frosting) for up to three months. Thaw and frost when needed. This makes it easy to have delicious treats on hand for unexpected guests or quick desserts.
6. Butter Alternatives: Substitute part of the butter in the frosting with cream cheese for a tangier flavor and a slightly lighter texture. This can also reduce the overall calorie content slightly while still providing a creamy consistency.
7. Decorating Tips: Use a piping bag with a star tip for a professional-looking swirl on top of your cupcakes. If you don’t have a piping bag, a zip-top bag with the corner cut off works well for piping.
8. Flavor Variations: Add a tablespoon of instant coffee granules to the cupcake batter for a mocha twist. The coffee enhances the chocolate flavor and adds depth to the overall taste of the cupcakes.
9. DIY Ferrero Rocher: Make your own Ferrero Rocher by rolling hazelnuts in Nutella, coating them in melted chocolate, and letting them harden. These homemade treats can be used as a garnish or enjoyed on their own.
10. Eco-friendly Baking: Use reusable silicone cupcake liners to reduce waste and save money in the long run. These liners are non-stick, easy to clean, and can be used multiple times, making them an environmentally friendly choice.
Let’s Learn About Silicone Baking Cup Liners and Other Baking Cup Liners
Silicone baking cup liners have gained popularity as a reusable, eco-friendly alternative to traditional paper liners. These silicone liners are flexible, non-stick, and durable, making them ideal for multiple uses. They eliminate the need for disposable paper liners, reducing waste and saving money over time. Additionally, they can be easily cleaned and stored, making them convenient for regular bakers.
Compared to traditional paper liners, which often come in a variety of decorative designs, silicone liners offer more versatility and sustainability. Paper liners are typically used once and discarded, contributing to environmental waste. However, some companies now produce compostable paper liners made from unbleached, chlorine-free materials, offering a more eco-conscious option.
The non-stick nature of silicone liners also means they don’t require greasing, making them a healthier option for those looking to reduce the use of added oils or fats in baking. When it comes to aesthetics, though, paper liners still win when you want a decorative touch for special occasions.