


No-Bake Cherry Cheesecake with Fresh Cherry Sauce
Share
This No-Bake Cherry Cheesecake is creamy, zesty, and topped with a homemade cherry sauce using fresh frozen cherries for a burst of natural sweetness. A refreshing and impressive dessert without needing to turn on the oven!
Yield
Serves 8–10
Ingredients
For the Crust:
- 1 1/2 cups graham cracker crumbs
- 1/4 cup granulated sugar
- 1/2 cup unsalted butter, melted
For the Cheesecake Filling:
- 16 oz (2 packages) cream cheese, softened to room temperature
- 1 cup powdered sugar
- 1 cup heavy whipping cream, cold
- 1/4 cup freshly squeezed lemon juice (about 2 lemons)
- 1 tablespoon lemon zest
- 1 teaspoon vanilla extract
For the Fresh Cherry Sauce:
- 3 cups frozen fresh cherries, pitted
- 1/4 cup granulated sugar (adjust to taste)
- 2 tablespoons cornstarch
- 1/4 cup water
- 1 teaspoon fresh lemon juice
Instructions
Step 1: Make the Crust
- In a medium bowl, mix the graham cracker crumbs, granulated sugar, and melted butter until combined.
- Press the mixture firmly into the bottom of a 9-inch springform pan to form an even crust.
- Chill the crust in the refrigerator for 20 minutes while preparing the filling.
Step 2: Make the Cherry Sauce
- In a medium saucepan, combine the frozen cherries, granulated sugar, and lemon juice. Cook over medium heat, stirring occasionally, until the cherries release their juices (about 5–7 minutes).
- In a small bowl, mix the cornstarch with water to create a smooth slurry.
- Spoon 2–3 tablespoons of the warm cherry liquid into the slurry and mix well to temper it.
- Gradually pour the tempered slurry into the saucepan, stirring constantly. Cook for another 2–3 minutes, or until the sauce thickens.
- Remove from heat and let the sauce cool to room temperature.
Step 3: Prepare the Cheesecake Filling
- In a large bowl, beat the cream cheese and powdered sugar together until smooth and creamy.
- Add the lemon juice, lemon zest, and vanilla extract, and mix until combined.
- In a separate bowl, whip the heavy cream to stiff peaks.
- Gently fold the whipped cream into the cream cheese mixture until smooth and fluffy.
Step 4: Assemble the Cheesecake
- Spread the cheesecake filling evenly over the chilled crust, smoothing the top with a spatula.
- Cover the pan with plastic wrap and refrigerate for at least 4–6 hours, or overnight for best results.
Step 5: Add the Cherry Sauce
- Once the cheesecake is set, remove it from the springform pan and transfer it to a serving plate.
- Spoon the cooled cherry sauce over the top of the cheesecake, allowing some sauce to drizzle down the sides.
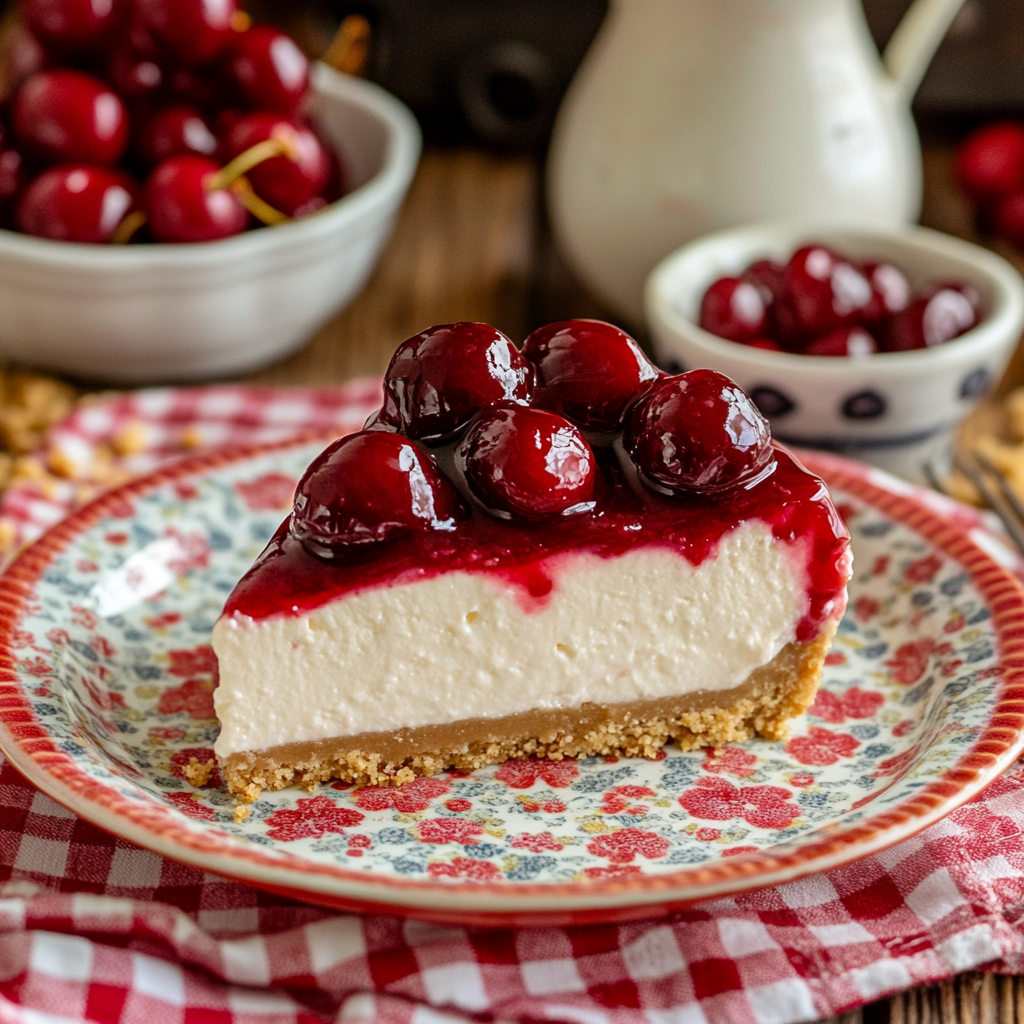
How It Looks and Tastes
This cheesecake has a creamy, tangy filling with a buttery graham cracker crust. The fresh cherry sauce adds a natural sweetness and vibrant color, creating a perfect balance of flavors and textures.
Nutritional Information (Per Slice, Based on 10 Slices):
Calories: 360 | Fat: 22g | Saturated Fat: 12g | Carbohydrates: 38g | Fiber: 1g | Sugars: 25g | Protein: 5g
Kitchen Tips
- Use Cold Cream: Ensure the heavy cream is cold for easier whipping.
- Frozen Cherries: No need to thaw the cherries before making the sauce; they’ll release their juices as they cook.
- Adjust Sweetness: Taste the cherry sauce while cooking and adjust sugar levels as needed.
- Smooth Slices: Dip your knife in warm water before slicing the cheesecake for clean cuts.
- Storage: Store leftovers in the refrigerator for up to 3 days.
This No-Bake Cherry Cheesecake with Fresh Cherry Sauce is a delightful and easy-to-make dessert that’s perfect for any occasion. Enjoy!