How to Make and Can Tomato Salsa: A Fun and Flavorful Tradition

Share
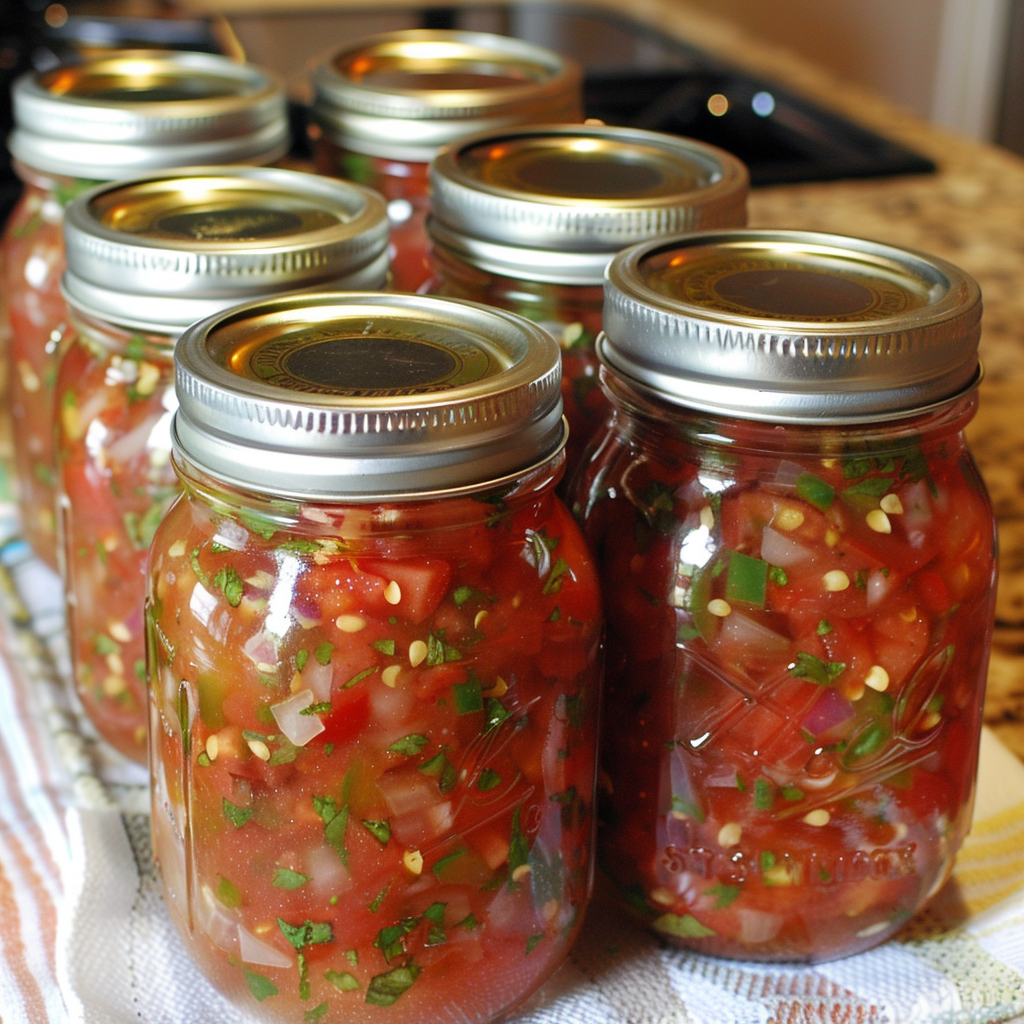
Canning Tomato Salsa Fills Up Your Pantry For A Season On Taco Snacking
There’s something incredibly satisfying about turning a garden’s bounty into jars of homemade salsa. When I had a large garden, making salsa became a yearly tradition as we harvested tomatoes, peppers, and onions. The rich aroma of fresh ingredients simmering filled the kitchen, making the effort worthwhile. One year, I invited a friend to help, and the day became a blend of laughter, conversation, and tasting. By evening, we had a dozen jars ready to be sealed, with each of us taking enough to last through winter. Salsa, especially homemade, always tastes better when shared with good company.
Did You Know?
Salsa, a Spanish word for "sauce," has been a staple in Mexican cuisine for centuries. Originally made with tomatoes, chilies, and other local ingredients, salsa has evolved into countless varieties enjoyed worldwide today.
Yield: 7 pints
Ingredients:
- 10 cups chopped tomatoes (about 6 pounds)
- 5 cups chopped onions
- 2 1/2 cups chopped green, red, or orange bell peppers
- 2 1/2 cups chopped jalapeño peppers (adjust to taste)
- 1 1/2 cups vinegar (5% acidity)
- 1 tablespoon pickling salt
- 4 cloves garlic, minced
- 1/2 cup chopped fresh cilantro (optional)
- 1 teaspoon ground cumin (optional)
Instructions:
-
Prepare the Jars:
- Sterilize Jars: Wash jars, lids, and bands in hot, soapy water. Rinse well. Place jars in a large pot, cover with water, and boil for 10 minutes. Keep jars hot until ready to use.
- Prepare Lids: Heat lids in simmering water (not boiling) until ready for use. Do not boil. Set bands aside.
-
Prepare the Vegetables:
- Chop Tomatoes: Wash and core tomatoes, then chop into small pieces.
- Chop Other Vegetables: Chop onions, green bell peppers, and jalapeño peppers.
-
Cook the Salsa:
- Combine Ingredients: In a large pot, combine chopped tomatoes, onions, bell peppers, jalapeño peppers, vinegar, salt, and garlic. Add cilantro and cumin if desired.
- Bring to Boil: Bring the mixture to a boil over medium-high heat, stirring frequently.
- Simmer: Reduce heat and simmer for 10 minutes, stirring occasionally.
-
Pack the Jars:
- Pack Salsa: Ladle hot salsa into hot jars, leaving 1/2-inch headspace.
- Remove Air Bubbles: Run a non-metallic spatula around the inside of the jar to remove air bubbles.
- Wipe Rims and Apply Lids: Wipe jar rims with a clean, damp cloth. Apply lids and screw bands until fingertip tight.
-
Process the Jars:
- Boiling Water Bath: Place jars in a boiling water canner. Ensure they are covered by at least 1-2 inches of water. Process for 15 minutes for pint jars.
- Cool Jars: Remove jars and place them on a towel to cool for 12-24 hours. Do not disturb while cooling.
- Check Seals: After cooling, check seals. Lids should not flex up and down when pressed. Store in a cool, dark place for up to a year.
Freezer Method:
- Prepare Salsa: Follow the same steps for cooking the salsa.
- Cool and Pack: Let salsa cool completely, then pack into freezer-safe containers, leaving 1/2-inch headspace.
- Freeze: Store in the freezer for up to 6 months.
Nutritional Information (Per Serving - 2 tablespoons of salsa):
Calories: 10, Protein: 0g, Carbohydrates: 2g, Fat: 0g, Sugars: 1g
Kitchen Tips, Great Ideas, How to Save Money:
- Choose Fresh Ingredients: Use fresh, ripe tomatoes and crisp peppers for the best flavor. Avoid overripe or bruised produce.
- Adjust Heat Level: Control the heat by adjusting the amount of jalapeño peppers. For milder salsa, use fewer jalapeños or substitute with milder peppers.
- Sterilization is Key: Always sterilize jars and lids to prevent contamination and ensure a long shelf life.
- Vinegar for Safety: Vinegar increases the acidity of the salsa, which is crucial for safe canning. Always use vinegar with 5% acidity.
- Salt for Flavor: Use pickling or canning salt to enhance flavor without adding unwanted additives.
- Headspace is Important: Leave the correct amount of headspace to allow for expansion during processing and to ensure a proper seal.
- Remove Air Bubbles: Removing air bubbles prevents trapped air, which can lead to spoilage. Use a non-metallic utensil to avoid damaging jars.
- Proper Sealing: Do not over-tighten lids. Fingertip tight is sufficient, allowing air to escape during processing.
- Storage Conditions: Store canned salsa in a cool, dark place to maintain quality and prevent spoilage. Avoid storing near heat sources or in direct sunlight.
- Labeling Jars: Always label jars with the date and contents. This helps keep track of inventory and ensures you use older jars first.
Here Are Some Helpful Ideas About What Variety of Onions To Choose
When making salsa, the type of onion you choose can greatly influence the flavor profile. For a classic, balanced taste, white onions are often the go-to, providing a sharp but clean flavor. Red onions add a bit of sweetness and a vibrant color to your salsa, perfect for those who prefer a slightly milder taste. Yellow onions, while more pungent, become sweeter as they cook, making them a good choice if you plan to heat your salsa before canning. Each variety brings its own unique twist to your homemade salsa, so feel free to experiment and find the one that best suits your palate!


