


Pumpkin Pie Recipe with a Rich, Flaky Crust
Share
Pumpkin pie has always been more than just a dessert in my family; it’s a symbol of warmth, tradition, and togetherness. I still remember standing on a stool in my mothers kitchen, carefully measuring out spices under her watchful eye. The smell of cinnamon, nutmeg, and ginger filled the air, signaling the arrival of the holiday season. Every year, we’d gather around the table, each of us with a slice of her famous pumpkin pie. It’s a recipe that’s been passed down with each of us adding our little twists while keeping the heart of the recipe intact. There’s something incredibly comforting about the simplicity of pumpkin pie—its seasonal flavors, the rich, creamy filling, and the flaky, buttery crust and with the use of gluten-free flour everyone, even the gluten intolerant can enjoy this pie. It’s a dessert that feels like a warm hug, and even though it’s a seasonal treat, it’s one I look forward to all year long.
Did you know?
Pumpkin is not only delicious but also packed with nutrients. It's a great source of vitamin A, which is essential for good vision, immune function, and skin health. Pumpkin is also rich in antioxidants like beta-carotene, which can help protect your cells from damage. Additionally, pumpkin is low in calories and high in fiber, making it a filling and nutritious choice for desserts and other dishes.
Yield: 8 servings
Ingredients:
For One Single Crust:
1 1/2 cups all-purpose flour
1/2 teaspoon salt
1/2 cup cold unsalted butter, cubed
1/4 cup ice water
For the Filling:
1 can (15 oz) pumpkin puree
3/4 cup granulated sugar
1/2 cup packed brown sugar
1 teaspoon ground cinnamon
1/2 teaspoon ground ginger
1/4 teaspoon ground nutmeg
1/4 teaspoon ground cloves
1/2 teaspoon salt
3 large eggs
1 cup evaporated milk
Instructions:
Prepare the Crust:
In a large bowl, whisk together the flour and salt.
Personal Tip: Whisking the flour and salt together ensures that the salt is evenly distributed throughout the flour, which is important for a well-seasoned crust.
Cut in the cold butter using a pastry cutter or your fingers until the mixture resembles coarse crumbs.
Personal Tip: Keep the butter as cold as possible while cutting it into the flour. Cold butter creates pockets of steam as the pie bakes, leading to a flaky, tender crust.
Gradually add the ice water, one tablespoon at a time, mixing until the dough comes together.
Personal Tip: Adding the water slowly helps you avoid adding too much, which can make the dough tough. The goal is to add just enough to bring the dough together.
Form the dough into a disk, wrap in plastic wrap, and refrigerate for at least 1 hour.
Personal Tip: Chilling the dough allows the gluten-free flour to hydrate and the butter to firm up, which makes the dough easier to roll out and helps prevent shrinking during baking.
Preheat your oven to 375°F (190°C).
Personal Tip: Make sure your oven is fully preheated before you start baking to ensure even cooking and a properly set crust.
Roll out the dough on a floured surface to fit a 9-inch pie dish.
Personal Tip: Rolling the dough between two sheets of parchment paper can make the process easier and prevent sticking.
Transfer the dough to the pie dish and trim the edges.
Personal Tip: Gently press the dough into the pie dish to avoid tearing. If the dough cracks, patch it up with excess dough and smooth it out with your fingers.
Blind bake the crust by lining it with parchment paper and filling it with pie weights or dried beans.
Personal Tip: Blind baking the crust ensures it stays crisp and doesn't become soggy when you add the filling. Pie weights or beans help keep the crust from puffing up and shrinking.
Bake for 15 minutes, then remove the parchment paper and weights and bake for an additional 5 minutes. Allow to cool slightly.
Personal Tip: Allowing the crust to cool slightly before adding the filling helps prevent the filling from cooking too quickly at the edges, ensuring a more even bake.
Prepare the Filling:
In a large bowl, whisk together the pumpkin puree, granulated sugar, brown sugar, cinnamon, ginger, nutmeg, cloves, salt, eggs, and evaporated milk until smooth and well combined.
Bake the Pie:
Pour the filling into the pre-baked crust.
Bake in the preheated oven for 45-50 minutes, or until the filling is set and a knife inserted into the center comes out clean.
Allow the pie to cool completely before serving.
Personal Tip: Let the pie cool on a wire rack to prevent the crust from becoming soggy due to steam.
Serve:
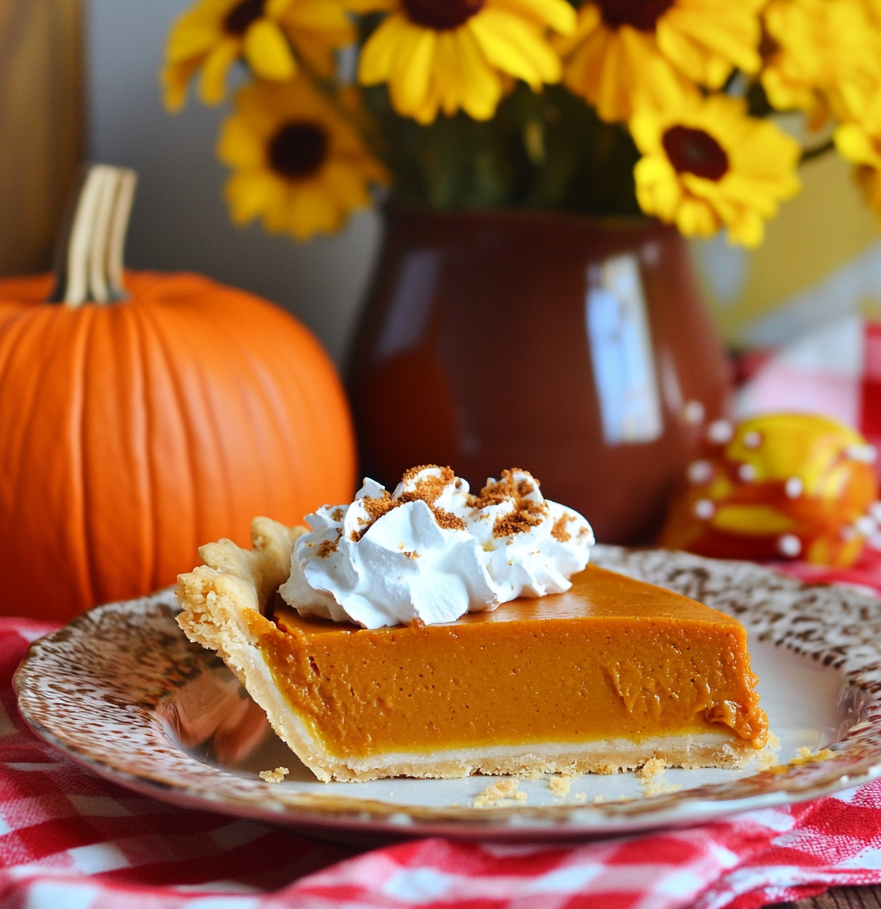
Serve slices with a dollop of whipped cream or a sprinkle of cinnamon.
Personal Tip: This pie is best served chilled; refrigerate it for a few hours before slicing for clean cuts.
Nutritional Information (Per Serving): Calories: 320 | Fat: 14g | Saturated Fat: 7g | Carbohydrates: 45g | Fiber: 2g | Sugars: 30g | Protein: 5g
Kitchen Tips, Great Ideas, How to Save Money
-
Bulk Buying: Purchase gluten-free flour and pumpkin puree in bulk. These ingredients are essential for many gluten-free recipes, and buying in larger quantities can significantly reduce the cost per unit, saving you money in the long run.
-
Homemade Pumpkin Puree: If canned pumpkin puree is expensive, consider making your own by roasting and pureeing fresh pumpkins. This can be more cost-effective and allows you to control the freshness and quality of the puree.
-
Reusable Baking Tools: Use reusable pie dishes and baking sheets. These tools are not only environmentally friendly but also save money over time compared to disposable options.
-
Energy Efficiency: Preheat your oven only when you are ready to bake, and try to bake multiple items at once if possible. This saves on energy costs and makes your baking process more efficient.
-
Smart Storage: Store any leftover pumpkin pie in an airtight container in the refrigerator. It will stay fresh for several days, providing a convenient and delicious dessert throughout the week.
-
Ingredient Substitutions: If evaporated milk is unavailable or too expensive, you can use a mix of regular milk and heavy cream for the filling. This can provide a similar texture and flavor.
-
Flavor Enhancements: Experiment with adding different flavors to your pumpkin pie, such as a hint of maple syrup or a splash of bourbon, to add a unique twist to your dessert. You can also top the pie with a dollop of whipped cream or a sprinkle of toasted pecans for added flavor and visual appeal.
-
DIY Vanilla Extract: Make your own vanilla extract by soaking vanilla beans in vodka. This homemade extract is more cost-effective and provides a rich flavor for your desserts.
-
Learning and Sharing: Join online gluten-free baking communities for more recipe ideas and tips. Sharing your own experiences can also help others and foster a sense of community.
-
Creative Presentations: Enhance the visual appeal of your pumpkin pie by decorating it with a lattice crust or cookie cutter shapes made from leftover dough. These additions not only add flavor but also create a beautiful presentation for your dessert.
What Is Evaporated Milk?
Evaporated milk is a shelf-stable canned milk product that has about 60% of its water content removed through heating. This process gives it a thicker consistency and a slightly caramelized flavor, which can enrich the texture and taste of baked goods like pumpkin pie. Historically, evaporated milk became popular because it was more reliable and longer-lasting than fresh milk, making it a staple in many pantries, especially before widespread refrigeration. It’s often used in recipes to add creaminess without the extra fat of cream, making it a versatile ingredient in both sweet and savory dishes.