


Easy Mini Cherry Galettes Recipe with Pre-Made Crusts
Share
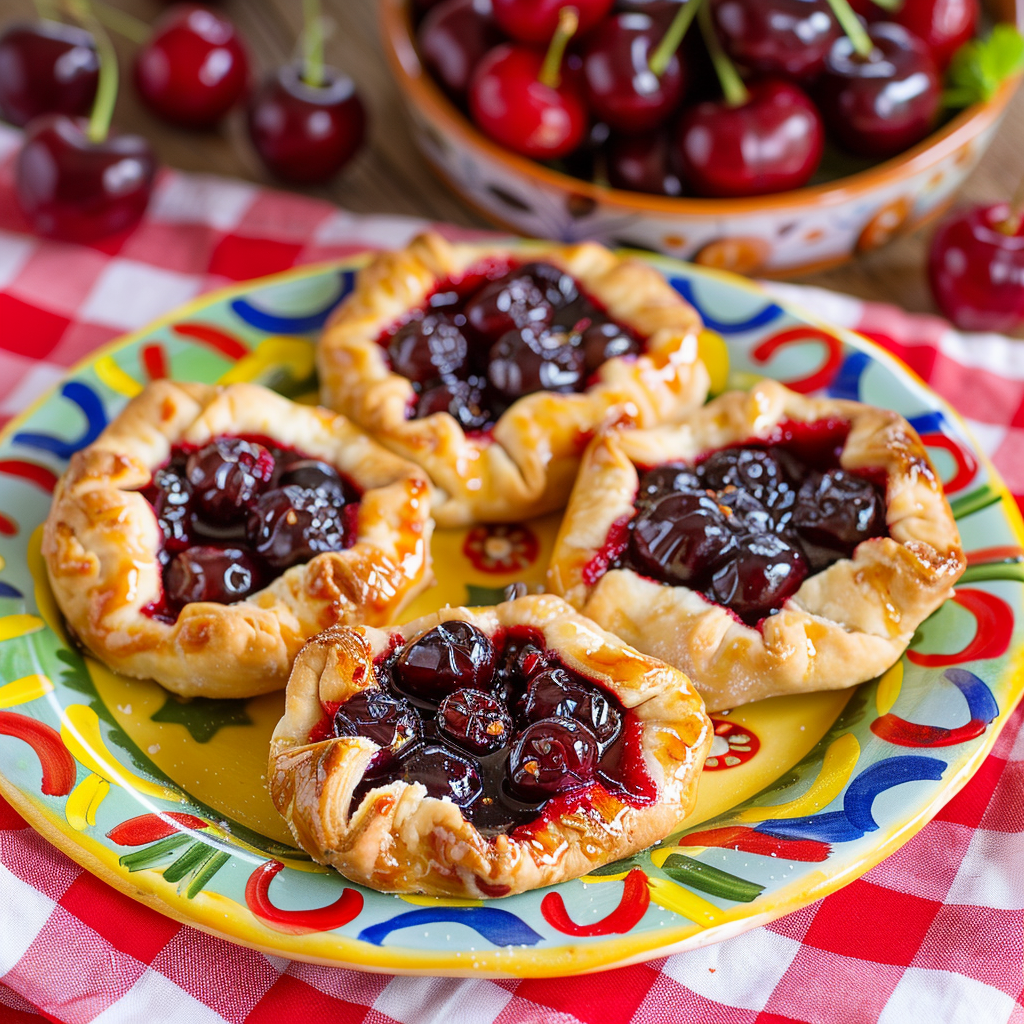
Mini Cherry Galettes - A Charming Mini Pie
Saturday mornings at the farmers market have always been a treat. The fresh produce and baked goods are irresistible, and one day I discovered a vendor selling galettes. These rustic, free-form pies were filled with juicy fruit wrapped in a golden, flaky crust. I had to try one, and after that first bite, I was hooked. The combination of tart cherries and buttery crust was divine. I decided to recreate the galettes at home, using pre-made pie crusts for convenience. Making mini cherry galettes turned out to be easy and fun, perfect for brunch or dessert. Their rustic appearance and rich flavor made them an instant hit with family and friends. They’re not only delicious but also a charming addition to any gathering.
Did You Know?
Galettes are a type of rustic, free-form tart that originates from France. They can be filled with a variety of fruits and are known for their simple, yet elegant presentation. Cherries are a great source of vitamins A and C, as well as antioxidants that can help fight inflammation.
Yield: 8 mini galettes
Ingredients:
2 cups fresh or frozen sour cherries
1/4 cup granulated sugar
1 tablespoon cornstarch
1 teaspoon vanilla extract
1 teaspoon orange zest
1 package pre-made pie crusts (2 crusts)
1 egg, beaten (for egg wash)
1 tablespoon coarse sugar (optional, for sprinkling)
Instructions:
Preheat the Oven: Preheat your oven to 375°F (190°C). Line a baking sheet with parchment paper.
Personal Tip: Using parchment paper helps prevent sticking and makes cleanup easier.
Prepare the Filling: In a medium bowl, combine the cherries, granulated sugar, cornstarch, vanilla extract, and orange zest. Mix well and set aside.
Personal Tip: Toss the cherries with a bit of flour if they are particularly juicy to help thicken the filling.
Cut the Dough: Roll out the pie crusts on a lightly floured surface. Cut each crust into 4 equal pieces (for a total of 8 pieces).
Personal Tip: Use a pizza cutter for quick and even slices.
Assemble the Galettes: Place a small mound of cherry filling in the center of each dough piece. Fold the edges of the dough over the filling, leaving the center exposed. Pinch the edges to seal.
Personal Tip: Don’t worry about making the galettes look perfect—part of their charm is their rustic, uneven edges.
Egg Wash: Brush the edges of the dough with the beaten egg and sprinkle with coarse sugar if desired.
Personal Tip: The coarse sugar adds a lovely crunch and a bit of sparkle to the finished galettes.
Bake: Place the galettes on the prepared baking sheet and bake for 20-25 minutes, or until the crust is golden brown and the filling is bubbly.
Personal Tip: Rotate the baking sheet halfway through baking to ensure even browning.
Cool and Serve: Allow the galettes to cool slightly on the baking sheet before transferring them to a wire rack. Serve warm or at room temperature.
Personal Tip: Serve with a scoop of vanilla ice cream for an extra special treat.
Nutritional Information (Per Serving): Calories: 200 | Protein: 3g | Carbohydrates: 30g | Sugars: 12g | Total Fat: 8g | Saturated Fat: 3g | Sodium: 150mg | Fiber: 2g
Kitchen Tips, Great Ideas, How to Save Money
- Fruit Substitutes: Use any seasonal fruit you have on hand, such as peaches, apples, or berries. Frozen fruit is also a great option.
- Homemade Crust: Make your own pie crust to save money and control the ingredients. There are many simple recipes available online.
- Spices: Add a pinch of cinnamon or nutmeg to the cherry filling for extra warmth and flavor.
- Make Ahead: Prepare the galettes ahead of time and freeze them unbaked. Bake directly from the freezer, adding a few extra minutes to the baking time.
- Serving Ideas: Serve with a scoop of vanilla ice cream or a dollop of whipped cream for an extra treat.
- Garnishing: Dust the finished galettes with powdered sugar for a touch of elegance.
- Eco-Friendly: Use reusable silicone baking mats instead of parchment paper to reduce waste.
- Leftovers: Store leftover galettes in an airtight container at room temperature for up to two days or in the refrigerator for up to five days.
- Presentation: Arrange the mini galettes on a beautiful platter for a stunning presentation at parties or gatherings.
- Cost-Saving Tips: Buy cherries in bulk when they are in season and freeze them for later use. This can save money and ensure you have cherries available year-round.
The History of Galettes
Galettes have their roots in the rustic kitchens of France, where they were originally a simple and practical way to use up scraps of dough. The word "galette" itself comes from the Norman word "gale," meaning flat cake. These free-form tarts were traditionally made with whatever fruits were on hand, making them a versatile and economical dessert for rural families. Over time, galettes became a beloved part of French cuisine, appreciated for their simplicity and elegance. Unlike more formal pies or tarts, galettes are celebrated for their imperfect, hand-crafted appearance, which adds to their charm. Today, galettes are enjoyed all over the world, filled with everything from sweet fruits to savory vegetables and cheeses. Their enduring popularity is a testament to the timeless appeal of this humble yet delightful dish.
Pre-Made Crusts - Where To Buy Them and What To Watch For on The Label
When opting for pre-made pie crusts, convenience is key, but it’s important to choose wisely. You can find pre-made crusts at most grocery stores, often in the refrigerated or frozen section. Look for brands that use simple, natural ingredients—flour, butter, or vegetable oils, and avoid those with hydrogenated fats or excessive preservatives. Reading the label ensures you get a crust that’s not only easy to work with but also tastes homemade. For an even better deal, buy in bulk when they’re on sale, and keep a few in your freezer for those last-minute dessert ideas.