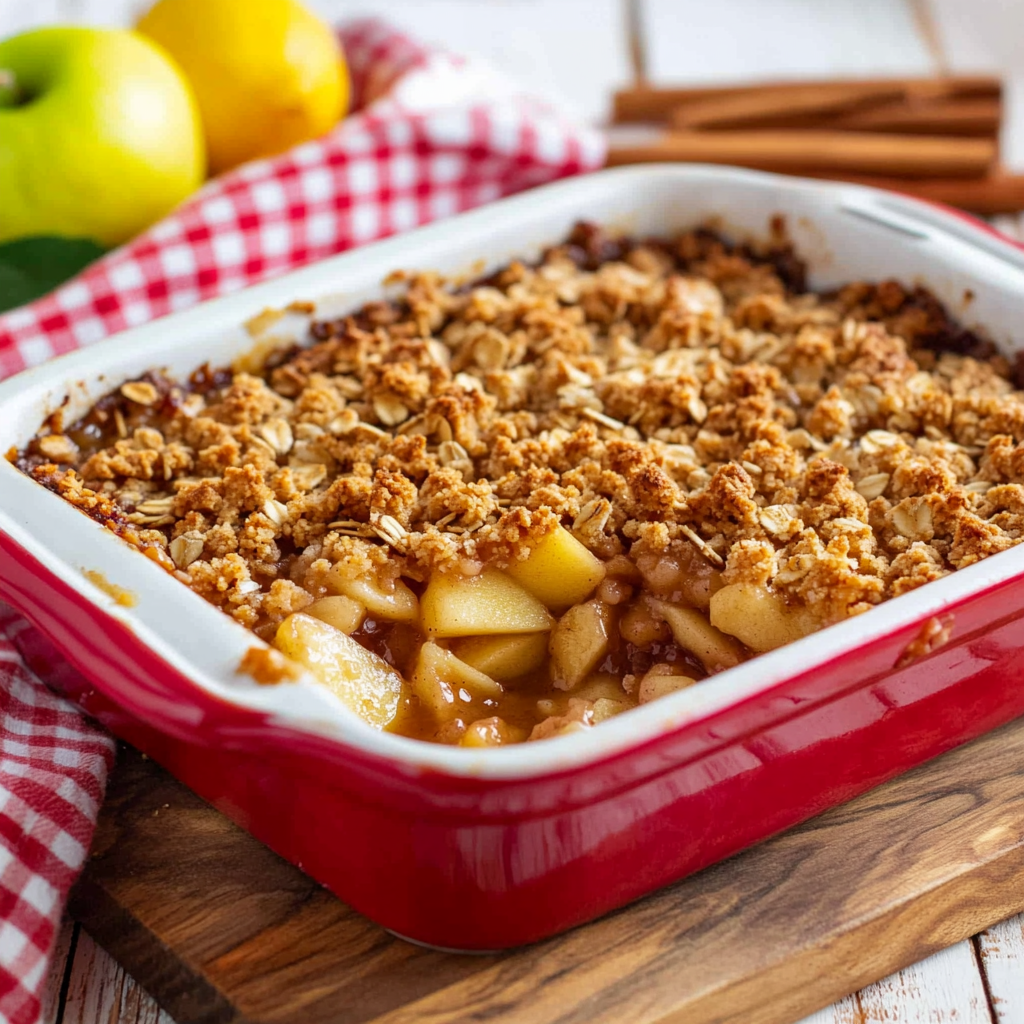
Apple Crisp Recipe - A Comforting Fall Dessert

Share
Apple Crisp Is An Easy Method of Enjoying Baked Apples With A Crispy Golden Top
I had the unique opportunity to live on an apple orchard for a couple of years, and during that time, I became well-acquainted with the world of apple desserts. With an abundance of apples surrounding me, it was only natural to start experimenting in the kitchen. Among all the apple pies, tarts, and sauces, apple crisp quickly became a favorite. The simplicity of this dessert is what makes it so appealing—just a few ingredients, yet the result is a warm, comforting dish that’s extra yummy straight from the oven. I love the aroma of cinnamon and baked apples filling the kitchen, and how that first bite, just as it reaches room temperature, was always the most satisfying, especially when paired with a scoop of natural vanilla ice cream.
Did You Know?
Apple crisp is a beloved dessert that dates back to the early 20th century in North America, particularly during the Great Depression when ingredients were often scarce. The crisp's simplicity and versatility made it a household favorite, especially because it didn’t require the more expensive and labor-intensive pie crust. The dish was originally known as "crumble" in the United Kingdom, where it also became popular. Today, apple crisp remains a staple in many homes, especially during the fall when apples are at their peak. It’s a comforting reminder of home-cooked meals and family gatherings, evoking memories of warmth and togetherness.
Yield: 6-8 servings
Ingredients:
Ingredients:
Filling:
6 cups peeled and diced apples (Granny Smith or Honeycrisp)
1 tablespoon lemon juice
1/4 cup granulated sugar
2 tablespoons light brown sugar, packed
2 tablespoons all-purpose flour
1 teaspoon ground cinnamon
1/4 teaspoon ground nutmeg (optional)
Crisp Topping:
1 cup old-fashioned rolled oats
1/2 cup all-purpose flour
1/2 cup light brown sugar, packed
1/2 teaspoon ground cinnamon
1/4 teaspoon salt
1/2 cup unsalted butter, cold and cut into small pieces
Instructions:
Preheat the oven to 350°F (175°C).
Grease a 9x9-inch baking dish.
Personal Tip: Using a glass or ceramic dish helps distribute heat evenly, resulting in a well-baked crisp.
Prepare the filling:
In a large bowl, combine the apples with lemon juice, granulated sugar, brown sugar, flour, cinnamon, and nutmeg. Toss to coat the apples evenly.
Personal Tip: Adding a bit of lemon juice not only brightens the flavor but also helps prevent the apples from browning.
Make the topping:
In another bowl, mix the oats, flour, brown sugar, cinnamon, and salt. Cut in the butter until the mixture forms coarse crumbs.
Personal Tip: Use a pastry cutter or two knives to cut in the butter until you have pea-sized crumbs. This creates a perfect, crumbly texture.
Assemble the crisp:
Spread the apple mixture in the prepared baking dish. Sprinkle the oat topping evenly over the apples.
Personal Tip: For an extra crispy topping, add a few more oats or nuts to the mix.
Bake:
Bake for 45-50 minutes, or until the topping is golden brown and the apples are tender.
Personal Tip: If the topping starts to brown too quickly, cover the dish loosely with foil for the remainder of the baking time.
Cool and serve:
Allow the crisp to cool slightly before serving. It's perfect on its own or with a scoop of vanilla ice cream.
Personal Tip: Serving it warm enhances the flavors, especially with a cold scoop of ice cream melting on top.
Nutritional Information (Per Serving): Calories: 310, Protein: 3g, Carbohydrates: 55g, Sugars: 32g, Total Fat: 12g, Saturated Fat: 7g, Fiber: 4g
Kitchen Tips, Great Ideas, How to Save Money
-
Choosing the Right Apples: For the best flavor and texture in your apple crisp, choose apples that are firm and slightly tart. Granny Smith apples are a classic choice due to their tartness and ability to hold their shape during baking. Honeycrisp apples are also excellent for their sweetness and crisp texture. Mixing different varieties can give your crisp a more complex flavor profile.
-
Reducing Sugar: This recipe uses a modest amount of sugar to let the natural sweetness of the apples stand out. Depending on the tartness of your apples, you can reduce the sugar even further. If you prefer, substitute the granulated sugar with a natural sweetener like honey or maple syrup, adjusting the quantity to taste.
-
Adding Texture: For those who enjoy a little extra crunch in their crisp, consider adding chopped nuts to the topping. Walnuts or pecans pair wonderfully with apples and add a rich, nutty flavor. If you’re allergic to nuts or prefer a different texture, try adding shredded coconut or even some granola for a unique twist.
-
Spicing It Up: While this recipe keeps the spices simple with cinnamon and a touch of nutmeg, you can experiment with other warm spices like allspice, ginger, or cardamom. A pinch of cloves can also add depth to the flavor, but be careful not to overdo it, as cloves can be quite strong.
-
Making It Ahead: Apple crisp is a great make-ahead dessert. You can prepare it up to the point of baking, cover it tightly, and store it in the refrigerator for up to a day before you plan to bake it. This makes it a convenient option for holiday meals or dinner parties.
-
Serving Suggestions: While apple crisp is delicious on its own, it pairs beautifully with a scoop of vanilla ice cream, a dollop of whipped cream, or a drizzle of caramel sauce. For a healthier option, serve it with a spoonful of Greek yogurt.
-
Storing Leftovers: If you have leftovers, apple crisp can be stored in an airtight container in the refrigerator for up to three days. To reheat, simply place it in a 350°F oven for about 10-15 minutes until warmed through. Microwaving individual portions is also a quick option, though the topping may lose some of its crispiness.
-
Freezing Tips: Apple crisp can also be frozen either before or after baking. To freeze before baking, assemble the crisp in a freezer-safe dish, wrap it tightly, and freeze for up to 3 months. When ready to bake, thaw overnight in the refrigerator and bake as directed, adding a few extra minutes if necessary. If freezing after baking, allow the crisp to cool completely before wrapping and freezing. Thaw in the refrigerator and reheat before serving.
-
Cost-Saving Tips: Purchasing ingredients like oats, flour, and sugar in bulk can save money in the long run, especially since these pantry staples have a long shelf life. Apples are often more affordable when bought in season, so plan to make apple crisp during the fall when apple prices are at their lowest. Additionally, you can save on butter by buying it in bulk when it's on sale and freezing it until needed.
-
Alternative Toppings: If you're looking to change things up, you can top your apple crisp with granola or crushed graham crackers instead of the traditional oat topping. This can add a different texture and flavor profile to the dessert.
What Are The Various Variety of Apples And What Ones Are Best For Baking?
Apples come in a wide range of varieties, each with its own unique flavor, texture, and level of sweetness or tartness. For baking, firm apples that hold their shape are ideal. Granny Smith apples are a popular choice due to their tartness and ability to maintain their structure during baking. Honeycrisp apples, known for their sweetness and crisp texture, are also excellent for baking as they provide a good balance of flavor and moisture. Other great options include Braeburn, Jonathan, and Northern Spy, all of which offer a blend of sweet and tart flavors that complement baked goods. For a more complex flavor, try mixing different varieties in your recipe. Each type of apple brings something different to the table, whether it's the tangy bite of a Granny Smith or the sugary sweetness of a Honeycrisp. Understanding these differences allows you to choose the best apple for your specific recipe, ensuring the perfect balance of taste and texture in your baked treats.


